

Facing image upload problems in WordPress websites? For most beginners, image upload errors can be very confusing because they can appear and most users find it difficult to understand. Unable to upload images is one of the most common image problems in WordPress. Fortunately, it is easy to repair, and it can be done by WordPress beginners.
This article describes how to easily fix the image upload problem in WordPress.
What causes image upload problems in WordPress
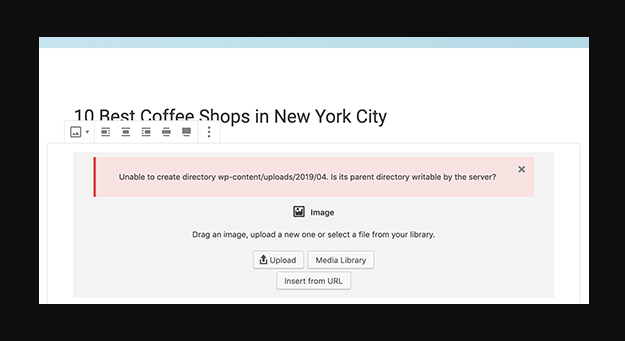
Image upload problems in WordPress are usually caused by incorrect file permissions. WordPress files are stockpiled on a web hosting server and necessitate precise file and directory authorizations to work. Incorrect file permissions will prevent WordPress from reading or uploading files on the hosting server. The error display in the image below may occur when uploading image files:
Unable to create directory error
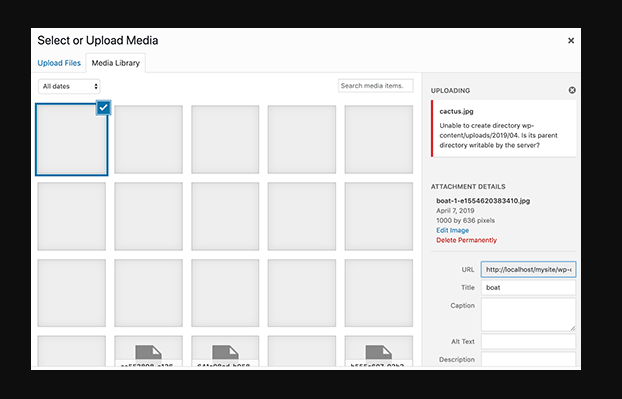
Another sign of this problem is that images may disappear from the media library.
Image is missing from the media library
Has my website worked properly before? Who changed the file permissions?
This can happen for a variety of reasons. Misconfigurations on shared hosting servers can sometimes change these permissions. For example, a web hosting service provider ran an upgrade that accidentally changed file permissions.
If everything else is working properly on the website, then what is needed is to only apply the correct file permissions to fix the image upload problem.
That being said, let’s take a look at how to set the correct file permissions to fix the image upload problem in WordPress.
Fix image upload problem in WordPress
The prerequisite is to use an FTP client to modify file permissions. First, connect to the website via FTP, then go to the / wp-content / folder. Inside, there will be an uploads folder, which is where WordPress stores all media uploads including images. Now right click on the uploads directory and select File Permissions.
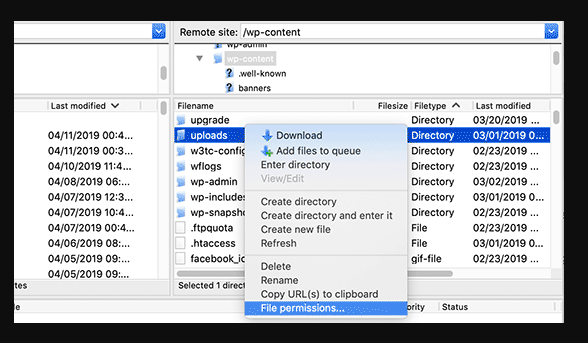
Open the file permissions dialog for the uploaded folder. This will open the file permissions dialog. First, set the file permissions of the upload’s directory and all subdirectories in it to 744.
Change folder permissions
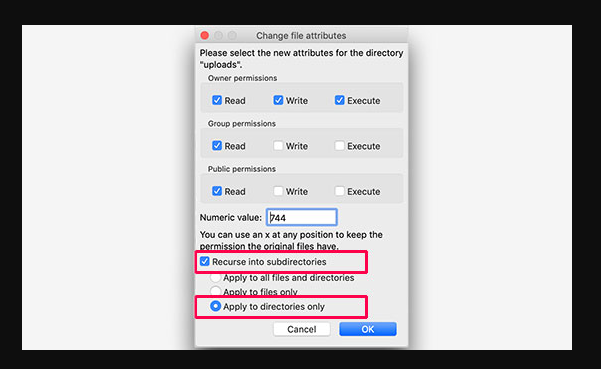
To do this, enter 744 in the value box, and then check want is next to the Recurse into subdirectories. Tick the “Apply to Directory Only”. Click the “OK” button to put on these variations. FTP client will now twitch to apply this file permissions to the directory.
Note: If setting the directory permissions to 744 does not seem to crack this delinquent, try 755.
In the next step, set file permissions for all files in the upload’s directory. To do this, right-click on the uploads directory and select file permissions. In the File Permission dialog box, change the value to 644.
Check the box next to the Recurse into a subdirectory. To end, “Apply to files only” Radio-button. Snap the “OK” button to apply these changes.
File permission
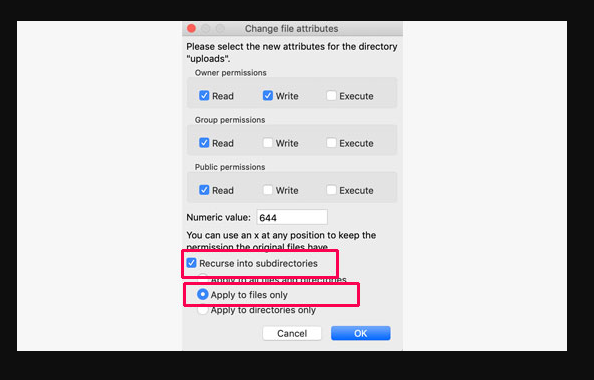
The FTP client will now change the permissions of all files in the uploads folder. When finished, return to the WordPress management area and try to upload the image again.


1 Comment