
Violent brute force attacks on WordPress sites is a headache. It will slow down the WordPress site. Thereby losing users. Reduce user experience. So how to protect WordPress site from brute force attacks, to solve this problem, let’s first understand the knowledge about brute force attacks.
What is a brute force attack?
A brute force attack is a hacker attack method, which uses trial and error technology to break into a website, network, or computer system. Hackers use automated software to send a large number of requests to the target system. For each request, this software will try to guess the information needed to access, such as a password. These tools can also disguise themselves by using different IP addresses and locations, which makes it more difficult for the target system to identify and prevent these suspicious activities. Successful brute force attacks can allow hackers to access the management area of a website. They can install backdoor programs, malware, steal user information, and delete all content on a website. Even an unsuccessful brute force attack can be raged by sending too many requests, which can slow down the WordPress hosting server or even crash.
That being said, let’s take a look at how to protect your WordPress site from brute force attacks.
Step 1. Install WordPress firewall plugin
Brute force attacks will place a heavy burden on your server. Even unsuccessful ones can slow down a website or completely crash the server. This is why it is important to block them before they reach the site server. For this, a website firewall solution is needed. The firewall filters out bad traffic and prevents it from accessing the website.
How website firewall works
There are two important types of website firewalls.
Application-level firewalls
Once these firewall plugins reach the site server it checks the traffic before loading most WordPress scripts. This method is not efficient because brute force attacks will still affect server load.
DNS-level website firewalls
These firewalls route website traffic through their cloud proxy servers. This allows them to only send normal traffic to the main web hosting server while improving WordPress speed and performance. Using Sucuri is recommended. It is the industry leader in website security and the best WordPress firewall on the market. Since it is a DNS-level website firewall, this means that all website traffic will pass through its proxy to filter out abnormal traffic.
Step 2. Install WordPress update
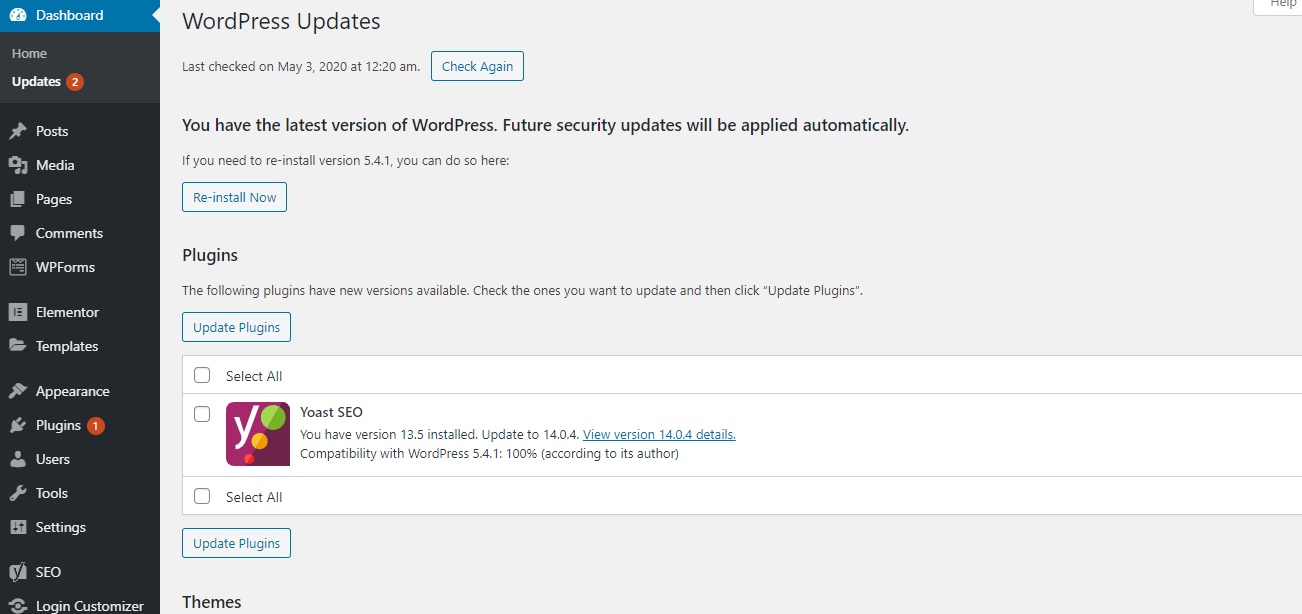
Some common brute force attacks actively target known vulnerabilities in older versions of WordPress, popular WordPress plugins, or themes. The WordPress core and the most popular WordPress plugins are open sources, and usually fix vulnerabilities quickly when they are updated. However, if the user fails to install the update, it will make their website vulnerable to these old threats. Just go to the Dashboard »Update page in the WordPress management area to view the available updates. This page will display all updates to WordPress core, plugins, and themes.
Step 3. Protect the WordPress management directory
Most brute force attacks on WordPress sites attempt to access the WordPress management area. You can add password protection in the server-level WordPress management directory. This will prevent unauthorized access to your WordPress management area.
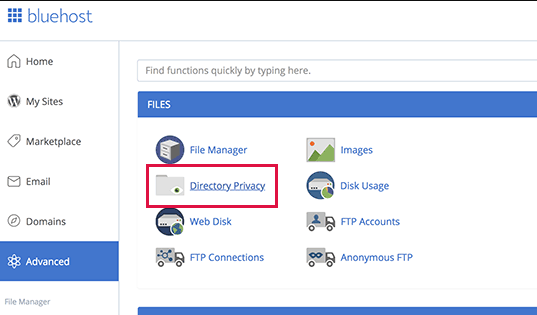
Just log in to your WordPress host control panel (cPanel) and click on the “Directory Privacy” icon under the “File” section.
Note: Bluehost is used in the screenshot, but other top hosting companies also provide similar settings, such as SiteGround, HostGator, etc.
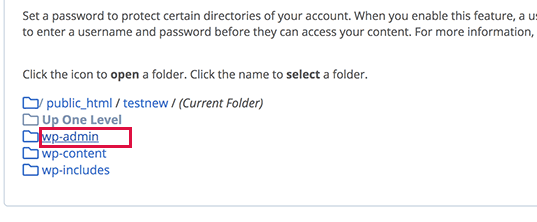
Next, you find the wp-admin folder and click on the folder name.
cPanel will now ask the user to provide the name of the restricted folder, username, and password. After entering this information, click the “Save” button to store the settings.
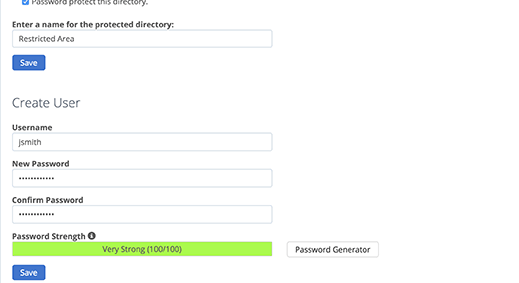
WordPress management directory is now password protected. When the WordPress management area is visited, a new login prompt is displayed. If you encounter a 404 error or too many errors redirect messages, add the following line to the WordPress .htaccess file.
ErrorDocument 401 default
Step 4. Add two-factor authentication in WordPress
Two-factor authentication adds an additional layer of security to the WordPress login screen. Basically, users need their mobile phone to generate a one-time password and their login credentials to access the WordPress management area.
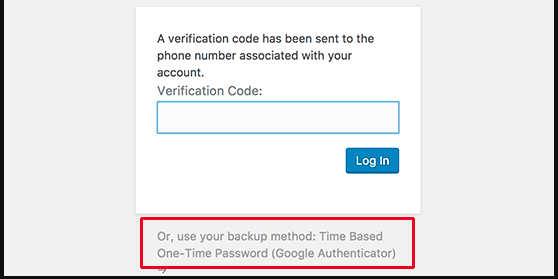
Adding two-factor authentication will make it harder for hackers to gain access, even if they are able to crack the WordPress password.
Step 5. Use a unique strong password
A password is a key to access a WordPress website. Use a unique strong password for all accounts. A strong password is a combination of numbers, letters, and special characters. It is important not to only use strong passwords for WordPress user accounts, but also strong passwords for FTP, web hosting control panels, and WordPress databases.
Most of the beginners ask how to remember all these unique passwords? Well, you don’t need to. Use a password manager.
Step 6. Disable directory browsing
By default, when the webserver cannot find an index file (i.e. Index.php or index.html etc.), it will automatically display an index page showing the contents of the directory.
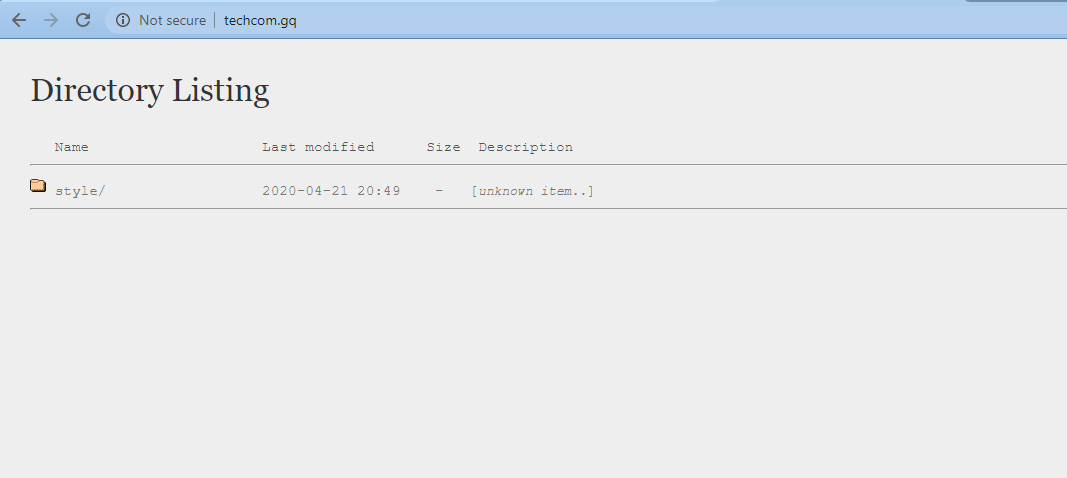
During a brute force attack, hackers can use directory browsing to find vulnerable files. To solve this
problem, add the following line at the bottom of the WordPress .htaccess file.
Options -Indexes
Step 7. Disable PHP file execution in specific WordPress folder
Hackers may want to install and execute PHP scripts in the WordPress folder. WordPress is mainly
written in PHP, which means it cannot be disable in all WordPress folders.
However, some folders do not require any PHP scripts. For example, WordPress upload folder is
located at / wp-content / uploads.
Safely disable PHP execution in the uploads folder, which is a common place hacker use to hide
backdoor files.
First, open a text editor (such as Notepad) on your computer and paste the following code:
<Files * .php>
deny from all
</ Files>
Now, save this file as .htaccess and use an FTP client to upload it to the / wp-content / uploads / folder
on the website.
Step 8. Install and set up WordPress Backup plugin
Backup is the most important tool in the WordPress security library. If all other methods fail, then the
backup will allow you to easily restore your website.
Most WordPress hosting companies offer limited backup options. However, these backups cannot be
guaranteed, so be responsible for making your own backups.


